Tinker Bell (or Tink), the pretty little fairy from Disney’s Peter Pan, caught the fancy of kids from the moment they laid eyes on her. With her golden blonde hair and bright green costume, she makes an interesting subject for a drawing project. Below is an easy step-by-step drawing of Tinker Bell for kids to achieve a neat picture of their beloved character.
Step 1
- The first step might look a bit complicated at first, but it is actually quite simple once you start working on it. First, make a circle for the head of your Tinker Bell, followed by an oval a little lower. Then join the circle and the oval with a curved line as shown in picture 1.
- Also, note the intersecting curves running through the center of the circle (head) and draw similar lines as these will later help you to keep the facial features in place.
- Now, see the same picture and draw small straight lines for the outlines of her arms and legs. Make small ovals to mark the points where you will later draw her hands, knees and feet.
- Move on to picture 2 to work on her shaggy bangs and the cute bun tied with a small ribbon.
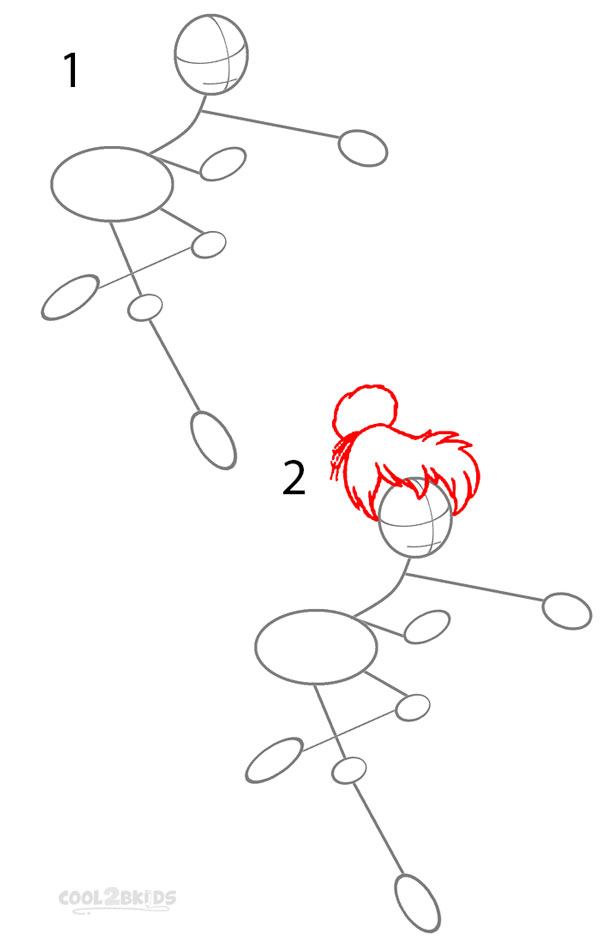
How to Draw Tinkerbell Step 1
Step 2
- Observe picture 3 carefully to work over the circle and draw the outer shape of Tink’s face. Do not forget to add the right ear visible in the picture.
- Next, draw her large eyes, eyebrows and a cute nose, followed by her lovely smile as shown in picture 4.

How to Draw Tinkerbell Step 2
Step 3
- Now, it is time to draw her tiny body, starting with the right arm, then the shoulders and the upper part of her torso (picture 5).
- Next, see picture 6 to draw the partially visible left arm and hand before working on Tinker Bell’s leafy, zigzag edged skirt.
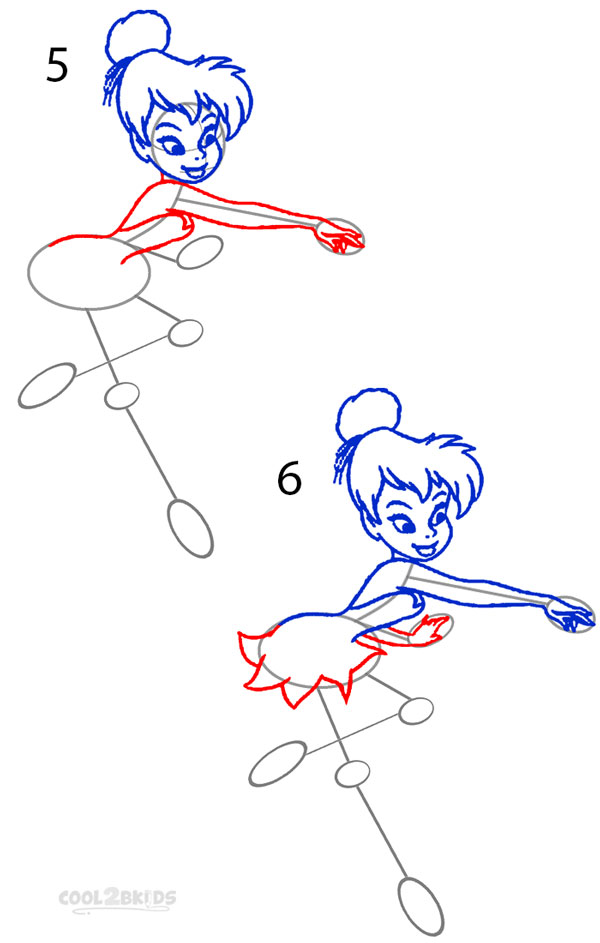
How to Draw Tinkerbell Step 3
Step 4
- Draw her right leg and her cute shoe with a pom pom as shown in picture 7. Use the lines and ovals made in step 1 as your guide to know where the knee and the foot will be.
- See picture 8 and do as you did in the earlier step, to draw the folded left leg and shoe.
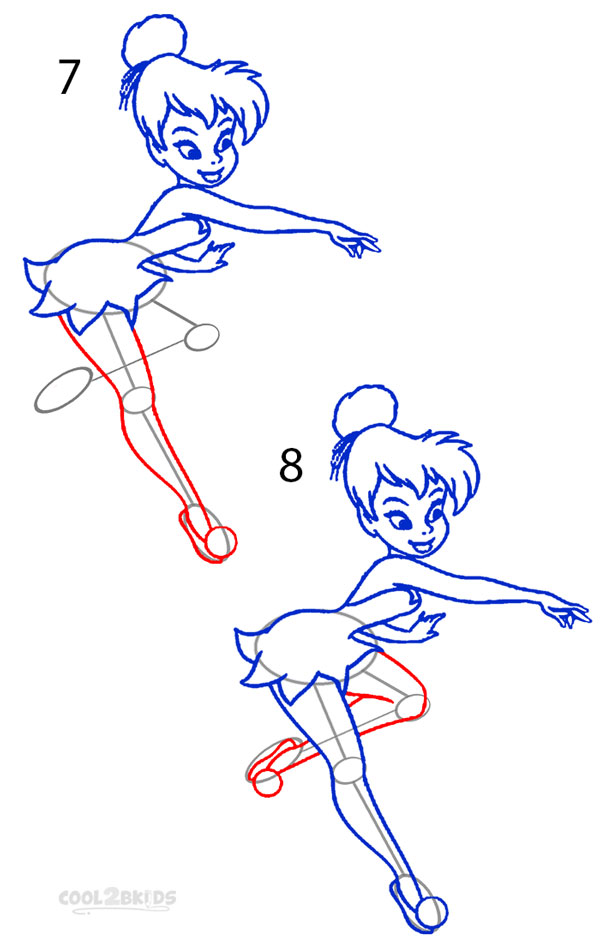
How to Draw Tinkerbell Step 4
Step 5
- This is a fun and easy step as all you will be doing is drawing her fairy wand weaving some sparkling magic (picture 9).
- Next is another fun step that only involves drawing the fairy wings of Tinker Bell as shown in picture 10.
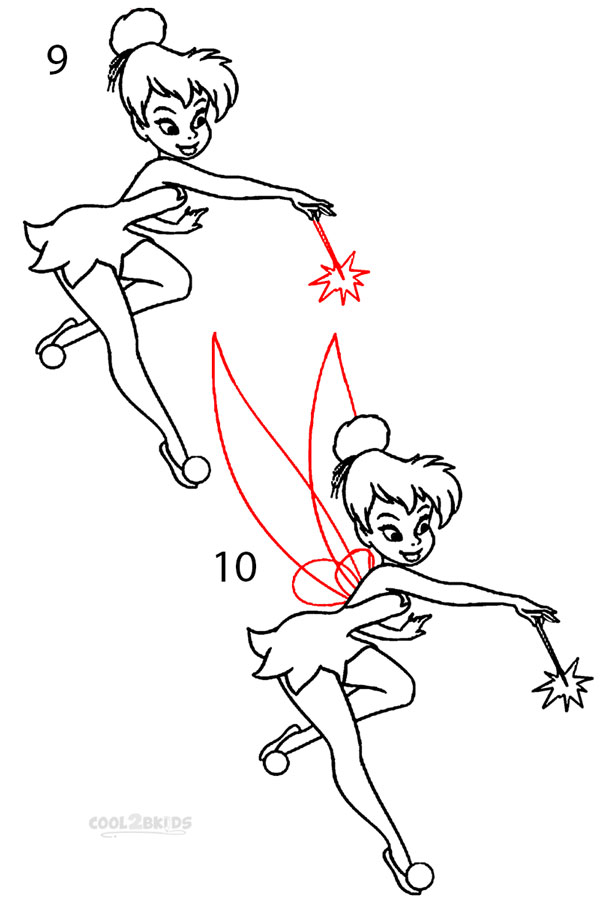
How to Draw Tinkerbell Step 5
Step 6
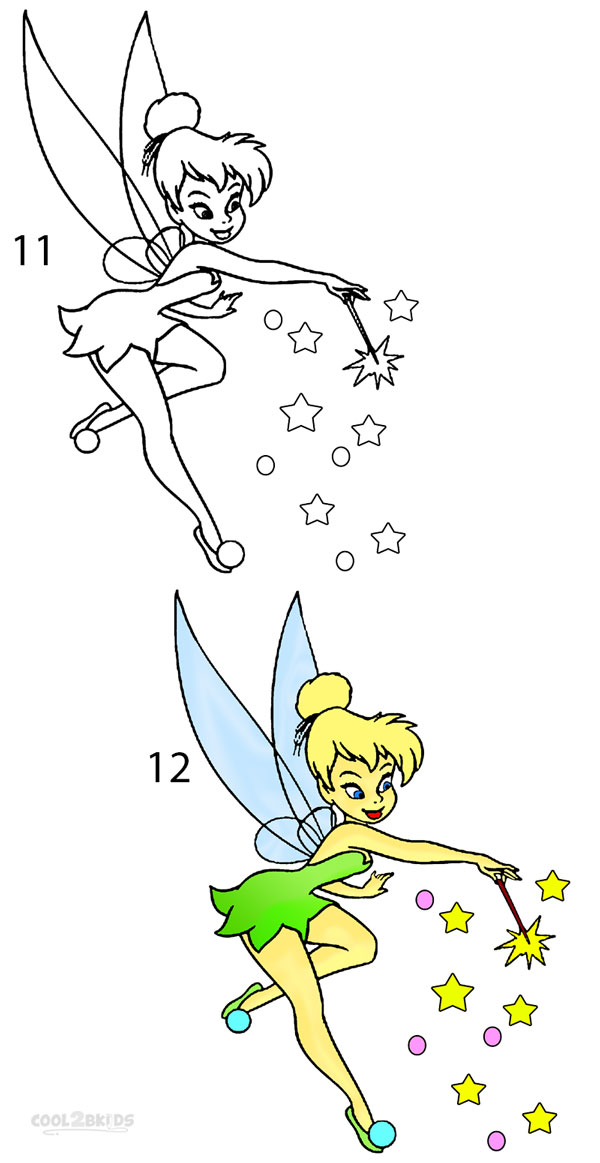
- Your picture is practically complete with only a few minor details left to be added. See picture 11 to add some magic stars and sparklers around the wand you drew in step 5.
- Now it is time to go get your crayon set, as a Disney Fairy will never look complete unless she is filled with bright colors. Use picture 12 as your guide to get the right shades of green and golden for her dress and hair. However, you can always experiment with your favorite shades to give her a stunning makeover.
How to Draw Tinkerbell Step 6
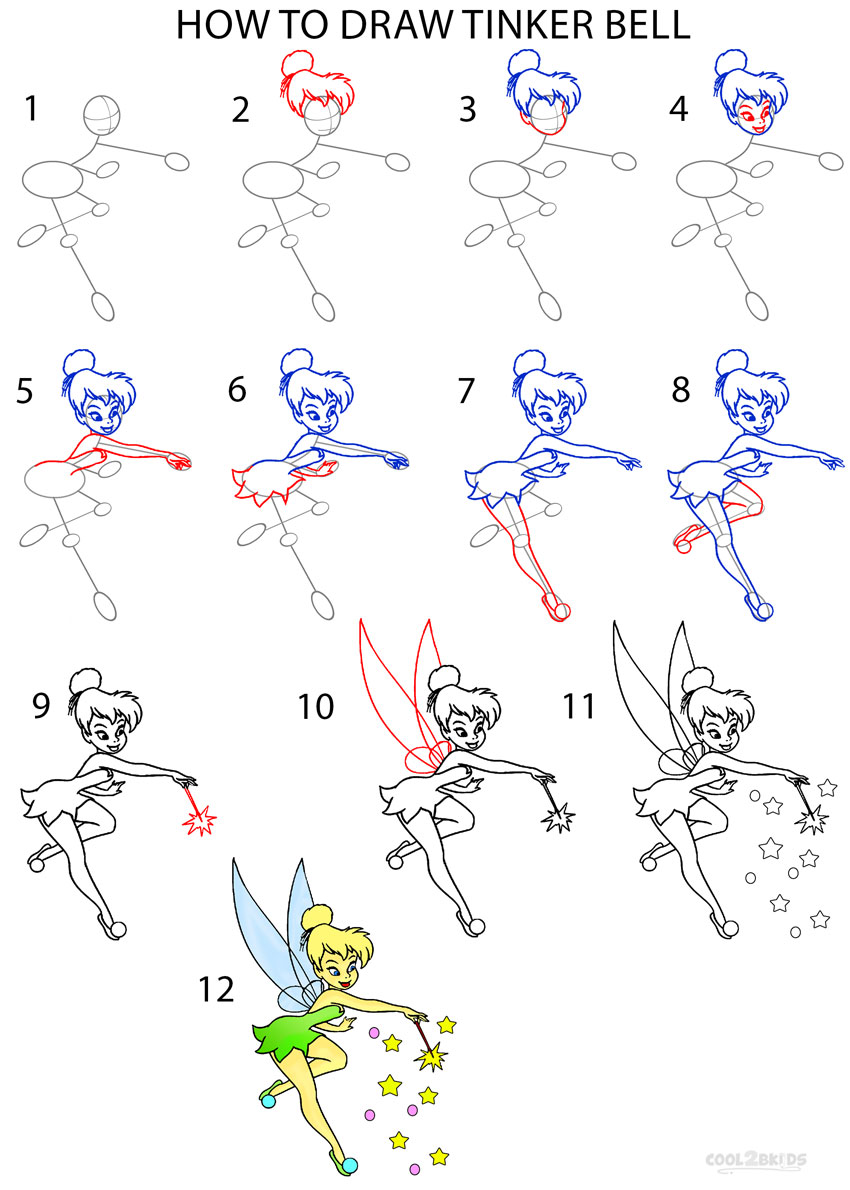
How to Draw Tinkerbell Step by Step


