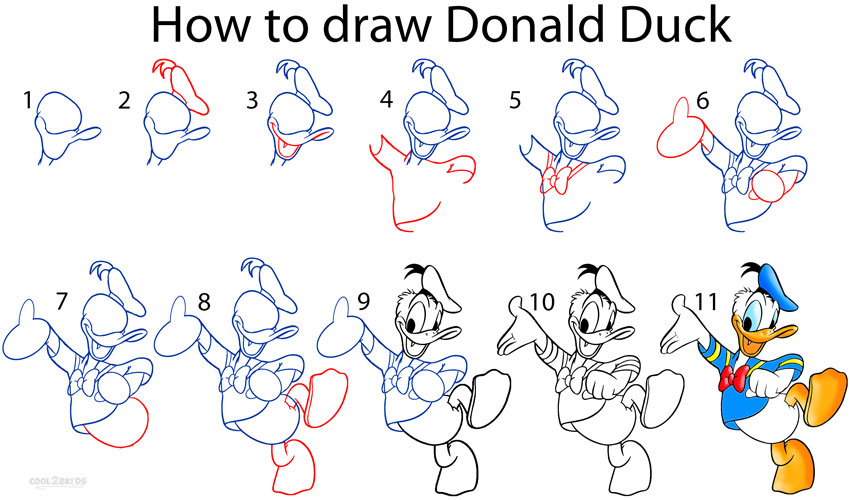
Donald duck, best friend to Mickey Mouse and one of the earliest characters created by Disney, continues to fascinate kids year after year. They love to watch his antics, whether trying to impress his girlfriend Daisy Duck or chasing off the popcorn thieves Chip and Dale. Here is an easy step-by-step drawing of Donald Duck to make it easier for kids to achieve a neat drawing of their beloved character.
Step 1
- Begin your drawing with a down-facing ‘C’ for the top of Donald’s head (Picture 1)
- Now, follow picture 1 and draw the outlines for his characteristic duck bill, followed by two parallel lines below the beak for his small neck.
- Next, work on Donald’s iconic cap with a small ribbon as shown in picture 2.
- Check picture 3 and note the red lines made for the details of his beak. Draw the beak in the similar manner to make it look realistic.
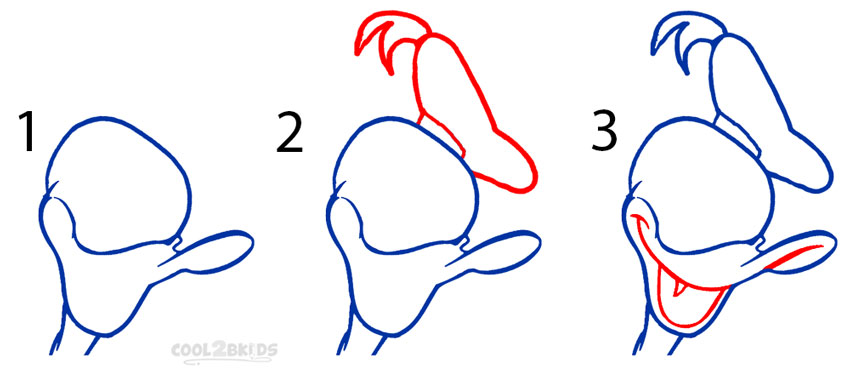
How to Draw Donald Duck Step 1
Step 2
- Now that the outline for the head of your Donald Duck is complete, it is time to start working on his sailor shirt and bow. See picture 4 to draw the basic outlines for the shirt.
- Next, draw a pair of parallel lines running down each of the shoulders of his shirt, followed by a large, fluffy bow tie (as shown in picture 5)
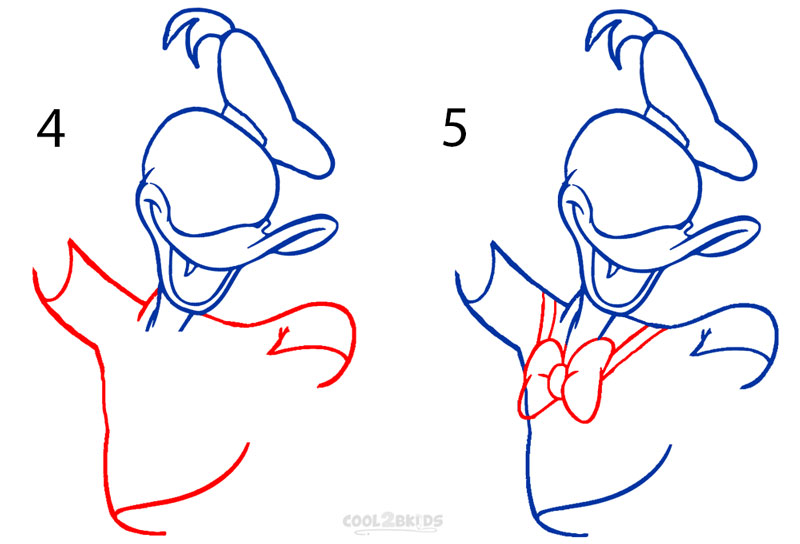
How to Draw Donald Duck Step 2
Step 3
- Follow picture 6 to draw the outlines for his hands through the sleeves of his shirt drawn in step 2. Make two small ovals for each hand and then make an upside down ‘U’ attached to the right hand oval for the right thumb. Do the same for the left thumb.
- Draw the lower part of his body as shown in picture 7.
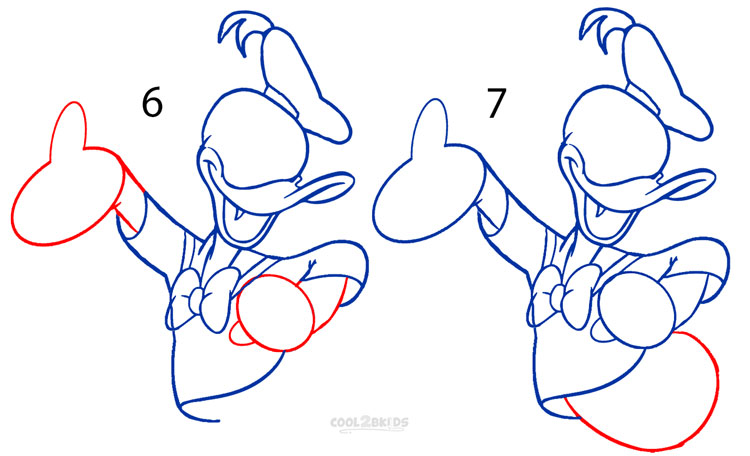
How to Draw Donald Duck Step 3
Step 4
- Next, see picture 8 and work on Donald’s webbed duck feet and the outline drawing is done.
- Now it is time to work over the outlines to make your fair drawing. Begin with the face of your Donald – draw two large eyes and high eyebrows (picture 9).
- Work over the outline of his head to give it a ruffled feathery appearance, followed by a pair of nostrils on the surface of the beak (picture 9).
- Finish drawing the legs by making a double line for the soles and erasing any overlapping lines.

How to Draw Donald Duck Step 4
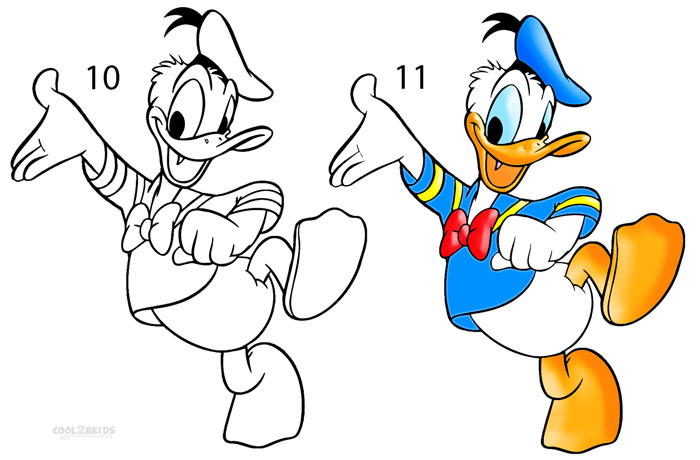
Step 5
- Next, work over the ovals made for the hands to draw three fingers and a thumb in each hand (Picture 10).
- Now, see the picture and draw double lined borders for the sleeves of his shirt as shown in the picture.
- The drawing is done and all that is left to do is filling the picture with the suitable colors. Use the right shade of blue to fill his shirt and cap followed by red for the bow. And do not forget to fill the sleeve borders you just made with a bright shade of yellow, and you have now made an accurate picture of Donald Duck.
How to Draw Donald Duck Step 5
How to Draw Donald Duck Step by Step


supper i treat to draw
t c