Drawing anything realistic is much more challenging than making a cartoon picture as the former requires you to depict the exact shape and size of things to bring life to your drawing. At the same time, it is much more fun to draw realistic pictures and show off your great artistic talents. Here is an easy step-by-step instruction so you can learn to draw a neat realistic rose.
Step 1
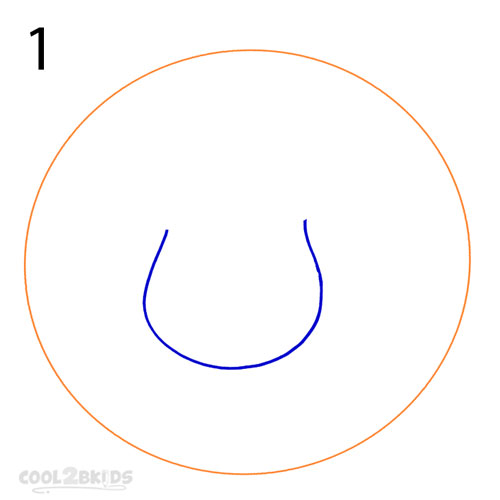
How To Draw a Realistic Rose Step 1
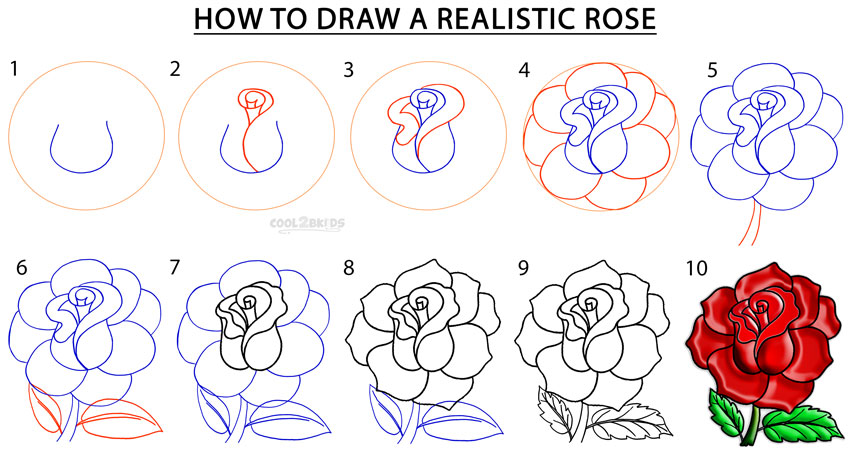
- Begin your drawing with an accurate circle made using a compass, making it as big as you want your rose to be. Now, see the above picture to draw a “U” shape in the middle of the circle.
Step 2
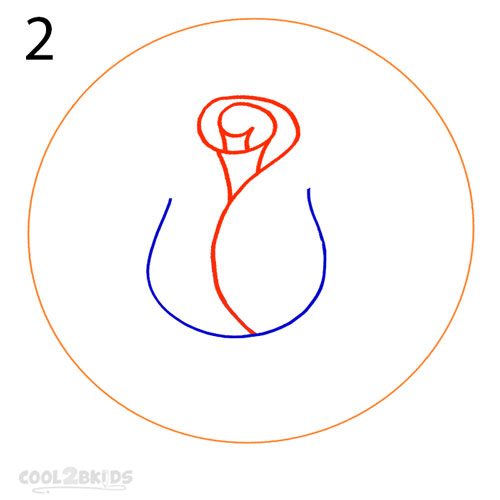
How To Draw a Realistic Rose Step 2
- See the picture to draw the twisted structure for the core of your rose.
Step 3

How To Draw a Realistic Rose Step 3
- Note the new curvy lines made with red in the above picture and imitate them in your own drawing.
Step 4
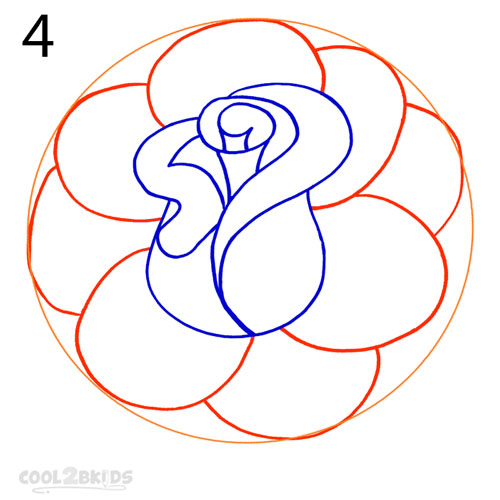
How To Draw a Realistic Rose Step 4
- Now this is a fun step as all you will be doing is making multiple roundish petals around the base of the rose (the “U” made in step 1).
Step 5
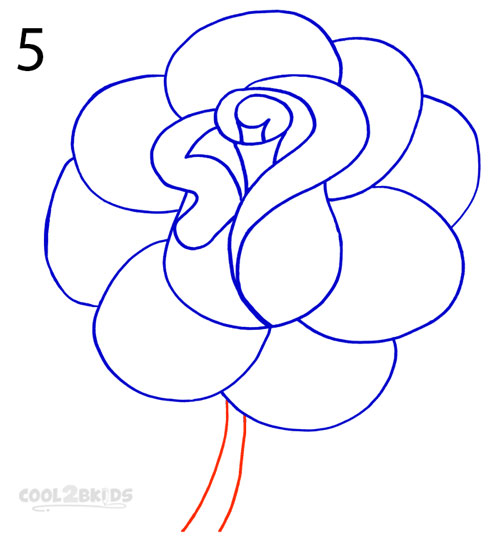
How To Draw a Realistic Rose Step 5
- Next, erase the basic circle drawn in step 1, careful not to rub out the rose petals. Now, add two curved lines at the bottom of the rose as shown in the picture (for its stalk).
Step 6
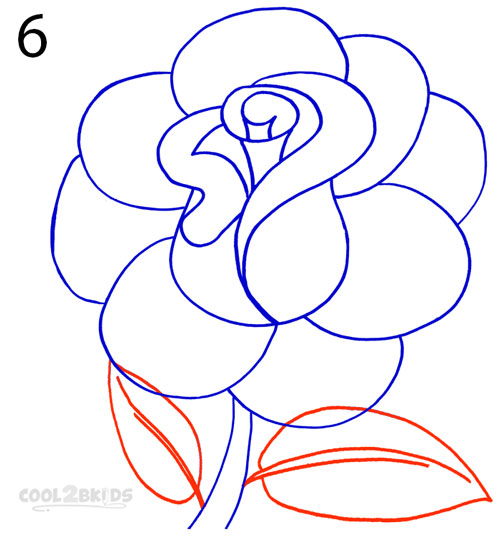
How To Draw a Realistic Rose Step 6
- Here, you will be drawing the outlines for two small rose leaves along with their primary veins.
Step 7
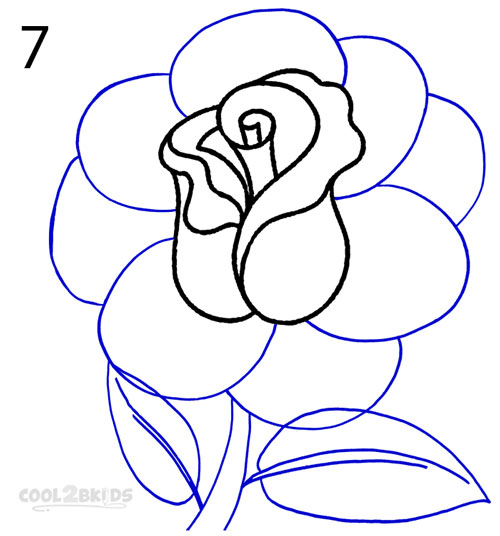
How To Draw a Realistic Rose Step 7
- Your outlined picture is done and all that is left to do now is to make it look more realistic. Check the above picture carefully to see how the edges of the core petals have been curved a little so they look real.
Step 8
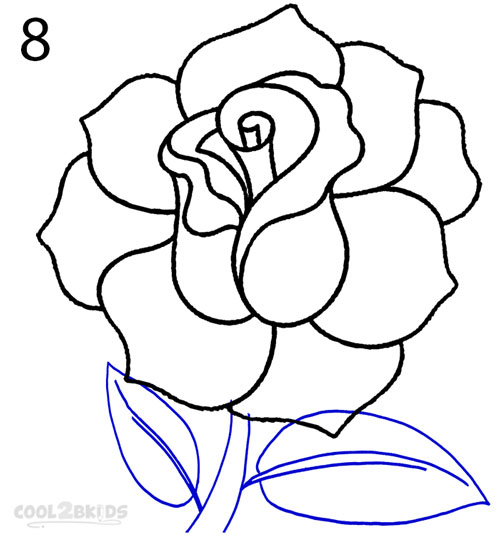
How To Draw a Realistic Rose Step 8
- Your outlined picture is done and all that is left to do now is to make it look more realistic. Check the above picture carefully to see how the edges of the core petals have been curved a little so they look real.
Step 9
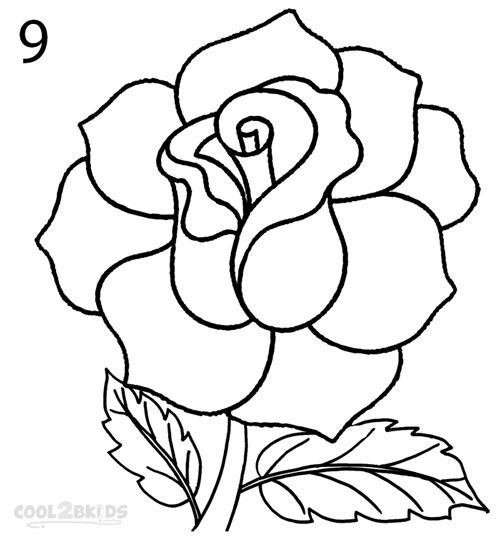
How To Draw a Realistic Rose Step 9
- The same has been done with all the petals in picture 8. Just erase the round edge of each petal and make it slightly pointy; your flower will look pretty real once you are done.
- Now it is time to work on the toothed edges (serrated margins) and the veins of the leaves so they become realistic as well. Just see the above picture and work the margins of the leaves as shown, followed by the veins.
Step 10

How To Draw a Realistic Rose Step 10
- Fill your beautiful rose and it leaves with suitable vibrant colors to complete your masterpiece.
How To Draw a Realistic Rose Step by Step


this is very good drawing and I got 100/100 for this drawing.