SpongeBob SqaurePants, the lovable title character from the kids’ show with the same name makes an interesting subject for drawing with his unique appearance and bright colors. However, it might not be as easy as it looks to attain a perfect drawing of the young sponge. Here is a step-by-step drawing of SpongeBob for kids to make the job easier.
Step 1
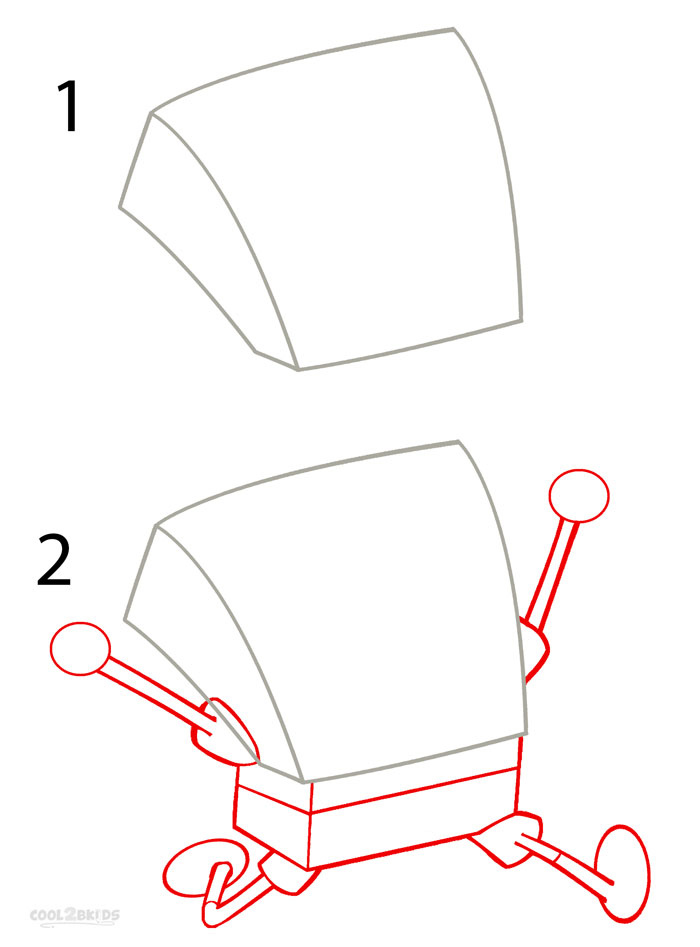
- Check out the first picture and draw a 3D rectangular shape that somewhat resembles a slice of cheese, only placed sideways. This is the basic outline for your SpongeBob’s body.
- Now, move on to picture 2 and begin by drawing his characteristic square pants, followed by outlines for his thin legs and feet.
- Next, work on his shirt sleeves followed by a pair of parallel lines with a small circle at their end for the rough outlines of his arms and fists (picture 2).
How to Draw Spongebob Step 1
Step 2
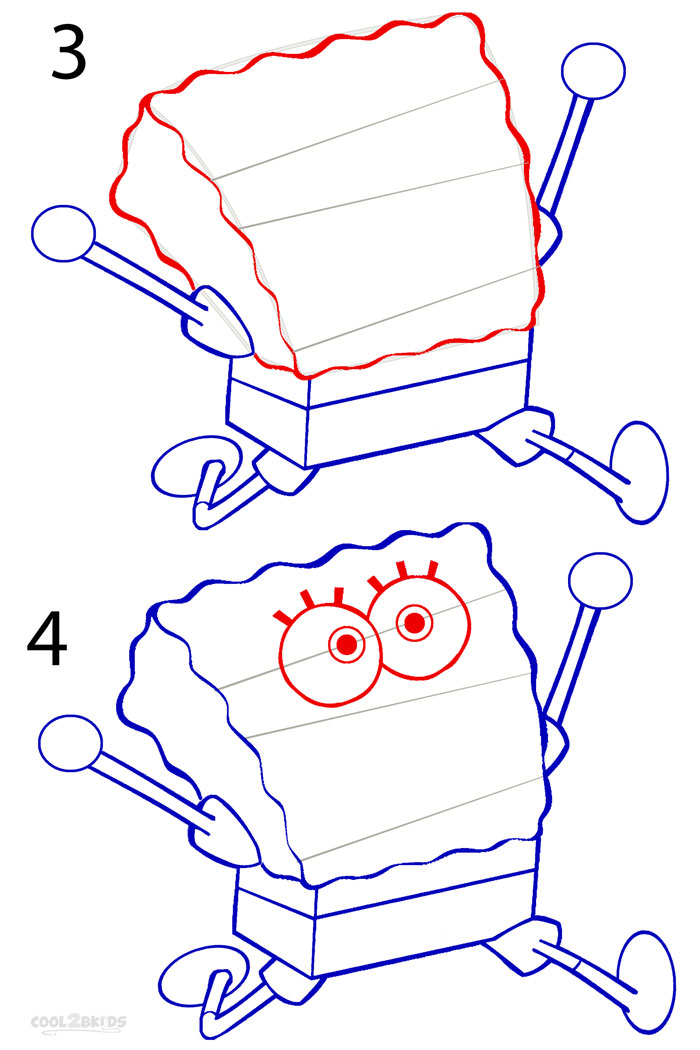
- See picture 3 and work over the edges of the slice of cheese you drew in step 1 to make them wavy, characteristic of SpongeBob SquarePants.
- Also make three straight lines through the front of SpongeBob’s body as shown in picture 3.
- Draw a pair of large round eyes in a way that the top line made in the last step runs through the middle of both the eyes. Next follows three distinct eyelashes for each eye.
How to Draw Spongebob Step 2
Step 3
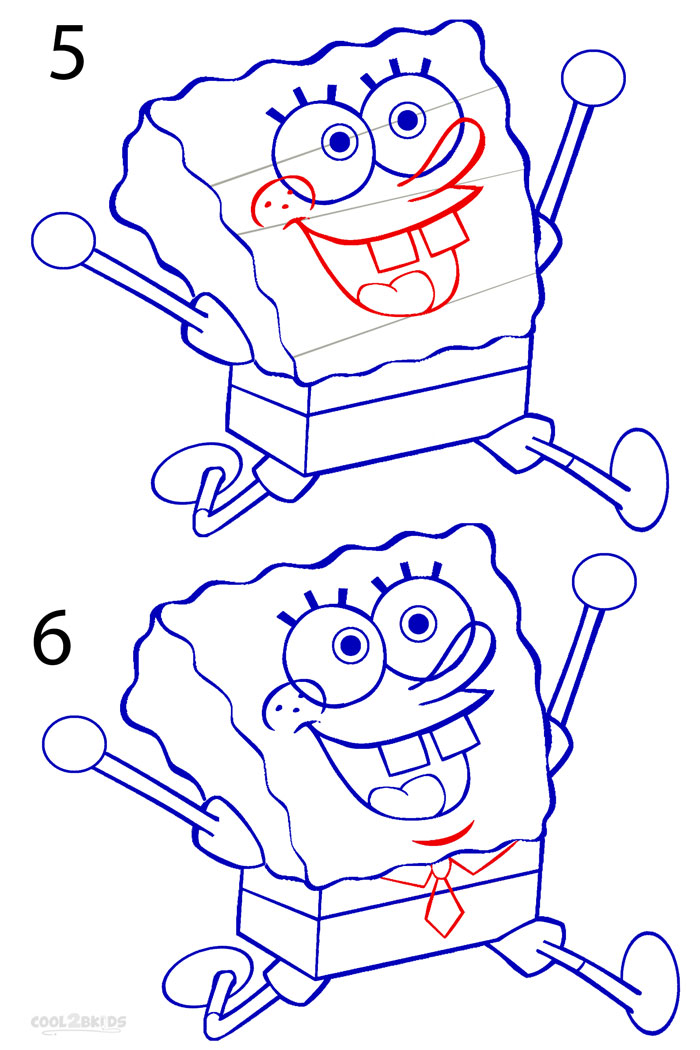
- Now, it is time to work on the rest of his face. Use the two lower lines you made in step 2 as your guide to draw SpongeBob’s trademark long nose, chubby cheeks, laughing face and two large front teeth as shown in picture 5
- Erase the straight lines carefully once you are done drawing the facial features.
- See picture 6 and draw a small half moon shape to distinguish his chin, followed by his neat shirt collars and a cute tie.
How to Draw Spongebob Step 3
Step 4
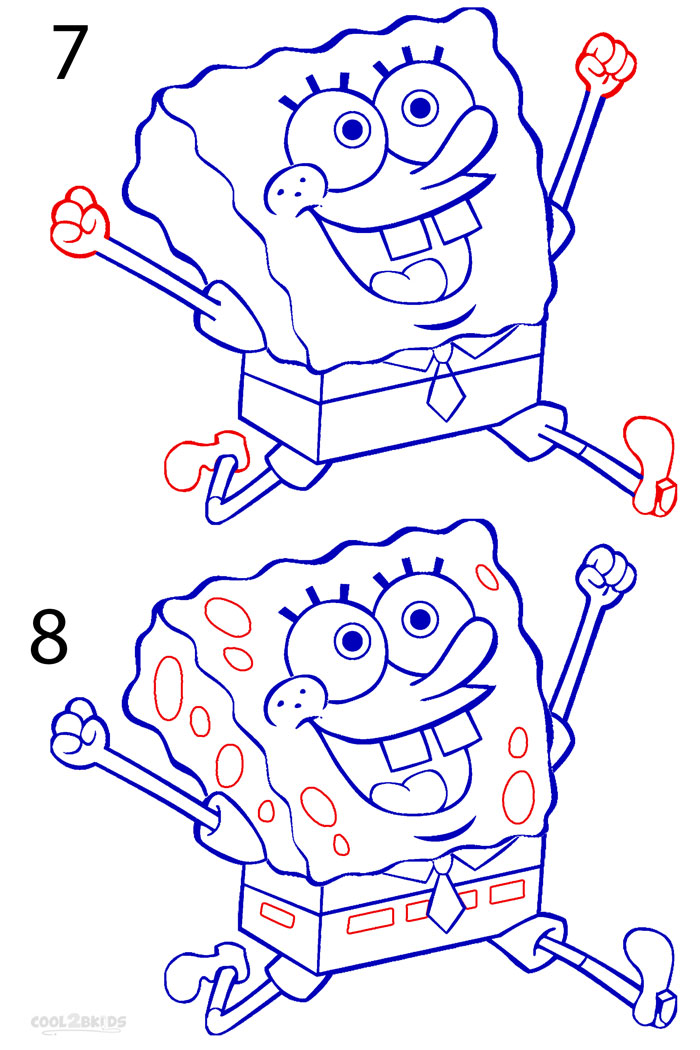
- Check picture 7 and replace the circles and ovals made for the hands and feet of your SpongeBob with small, realistic fists and tiny shoes. Do not forget the small lines marking his socks.
- This is an easy step as all you have to do is make different sized ovals throughout his face and then draw a few rectangles along the edge of his trousers for his belt.
How to Draw Spongebob Step 4
Step 5
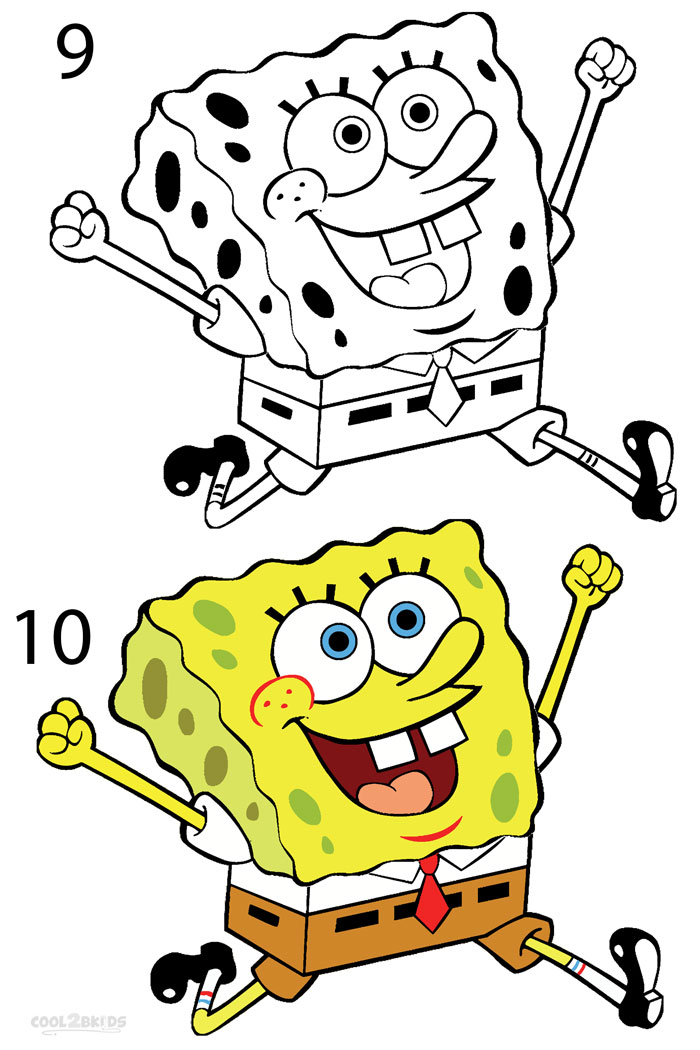
- Now, you can fill the ovals marking his face with black if you want to keep your picture black and white as he is looking pretty neat without colors in picture 9.
- Follow picture 10 if you intend to fill your drawing with colors. Use the picture as a guide to find the right shades of yellow, gray and brown. And make sure you do not miss the bright red tie.
How to Draw Spongebob Step 5
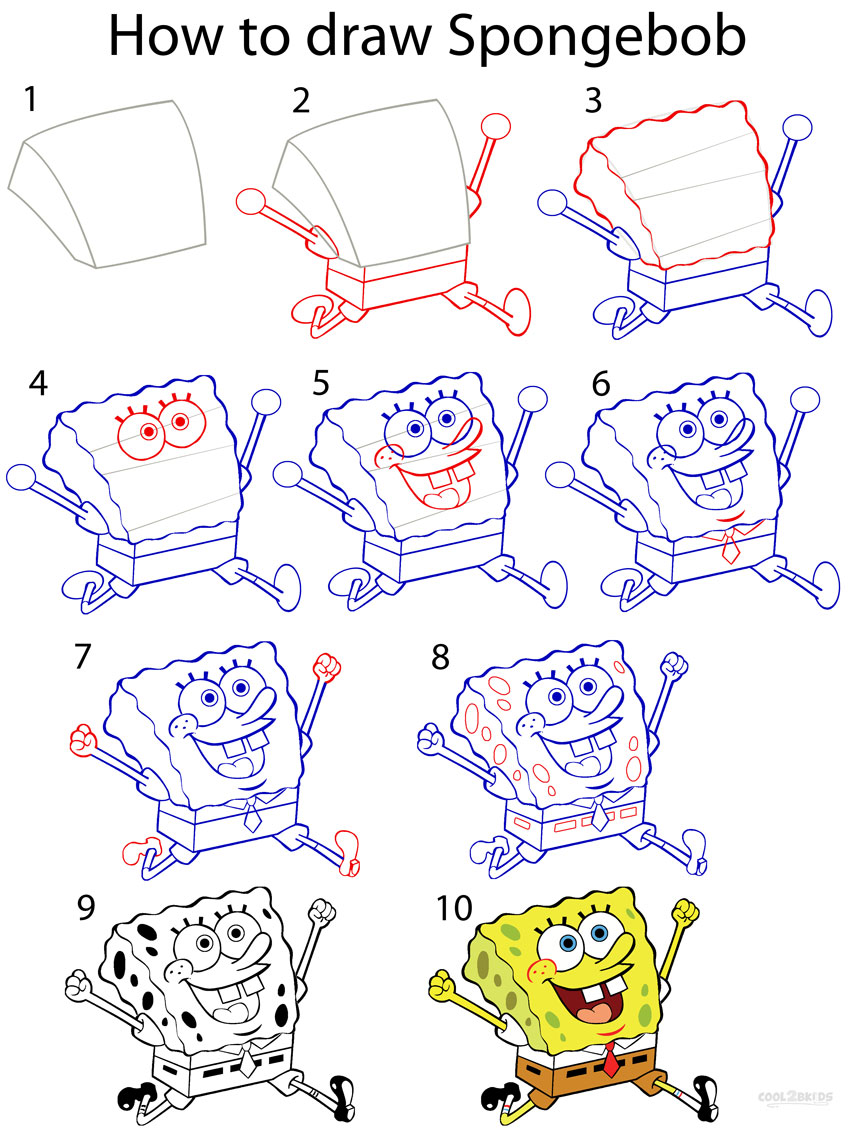
How to Draw Spongebob Step by Step


